SHIPPING WORLDWIDE WITH ALL IMPORT TAXES PRE-PAID

0

Your Cart is Empty

 Greg Mayo

Author

Categories

Categories

December 18, 2019 5 min read
3D Modelling a Geckota Watch

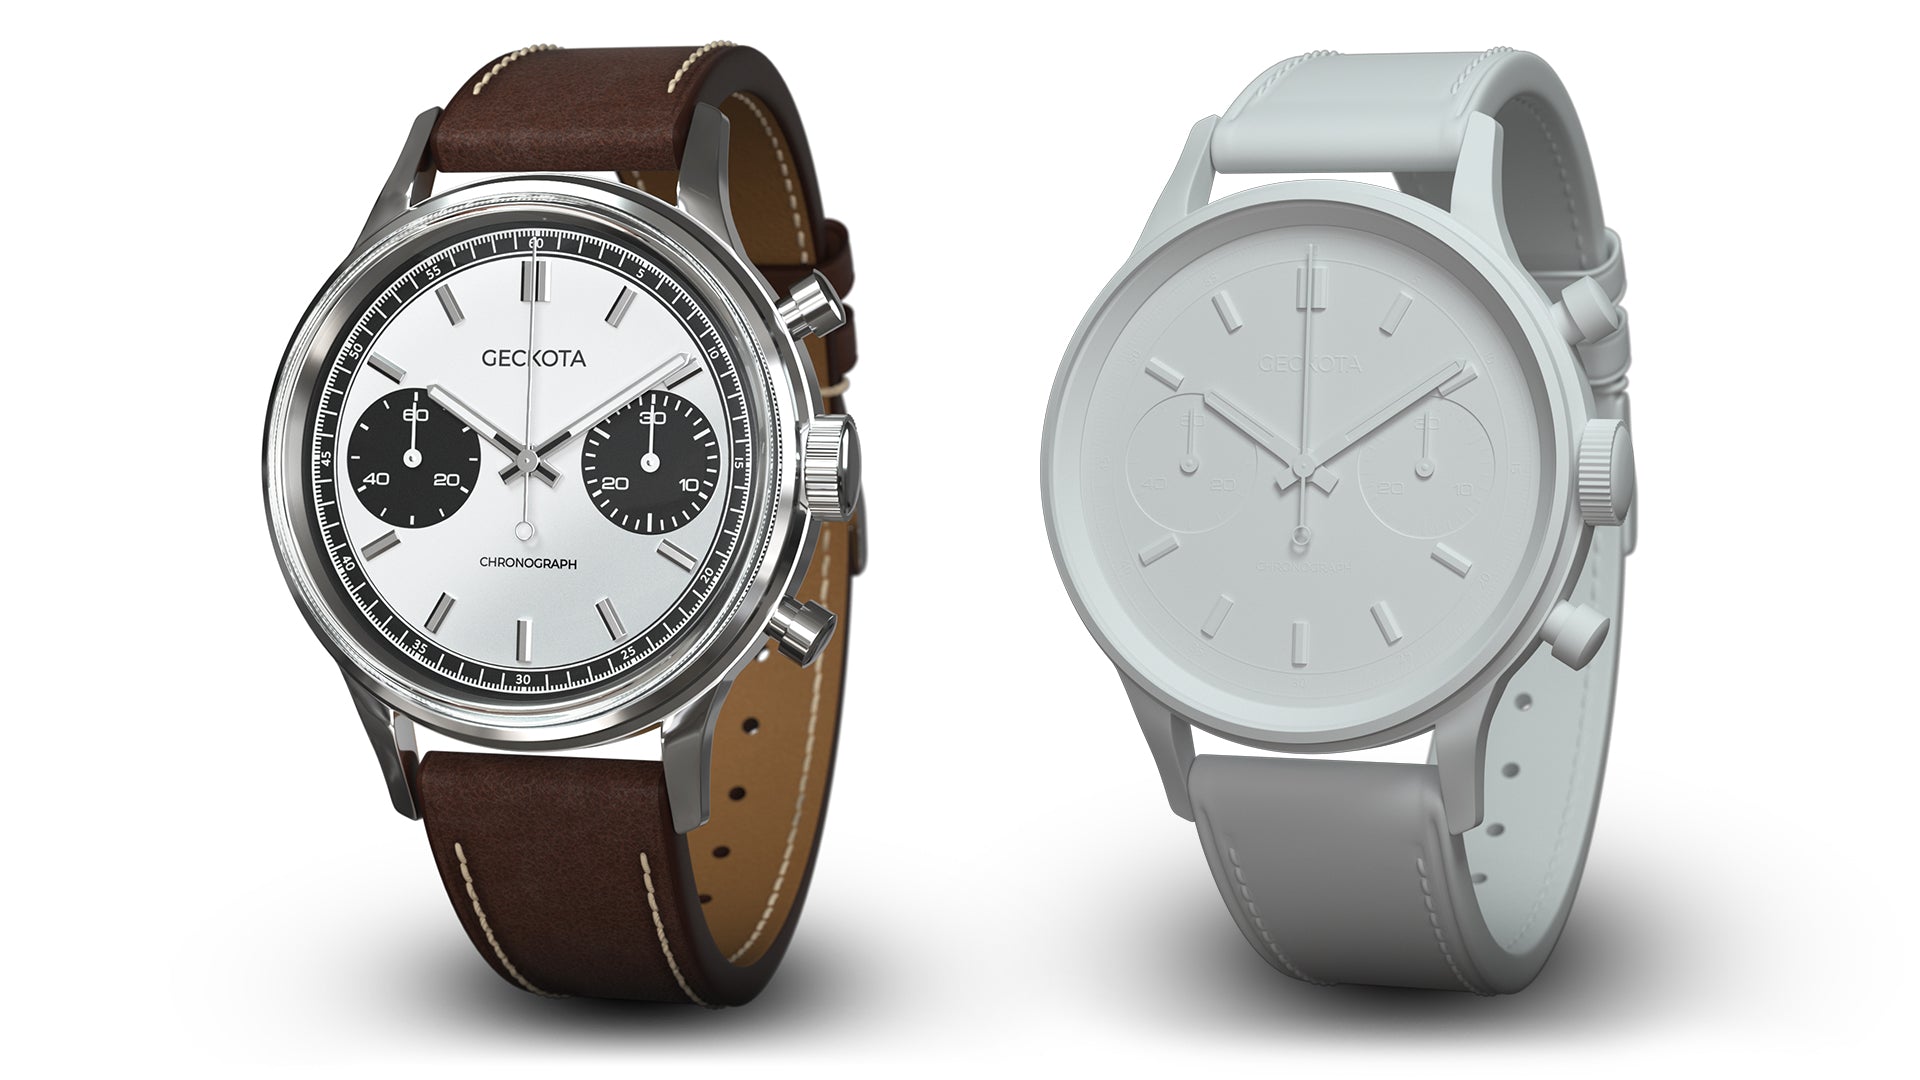
The use of 3D rendering is very useful when it comes to creating listings for upcoming Geckota watches. This is because we do not have to wait to be hands-on with the watch. I can create the watch in Cinema 4D and output photo-realistic renders to achieve the same results as if we had the watch. The example I will use throughout this post is the Geckota W-02 Vintage Mechanical Chronograph Racing Watch. There are 4 main steps that go into producing a final image. The modelling, the texturing, the positioning and the lighting. In this post I will be talking about the modelling.

The Setup

The entire process begins with 2D, to-scale technical drawings. These files are vital to be able to be accurate during modelling. You can almost think of it like using tracing paper on top of an image you want to replicate. To set this up in my software of choice, Cinema 4D, I simply apply the technical drawings to the background of my 'top' perspective view port. It is also very important that the technical drawing has been positioned correctly so that it is to scale. The method I use is the lug-width measurement, for the W-02 Racing Chrono it is 18mm. So once this measurement is positioned correctly the rest of the drawing will be to scale.

Modelling

Once aligned I then move onto the modelling. This part can take the longest especially when aiming for photo-realistic results. This is because the case is a very polished metal so if the model itself has some badly positioned polygons it will be very obvious when you go to render the watch and see all the warped reflections and surfaces. This process is hard to describe in a few sentences and is something you have to tackle with a practical mindset, you have a specific set of 'primative' shapes and using Cinema 4D's tools and how do you take those shapes and turn them into what you want to render. The tools are an important aspect of this process. The functions and modifiers I use the most often are Extrude, Boole, Symmetry, Loop cut, Bevel, Weld and Subdivision Surface. I will re-visit these later in the post. I begin modelling the watch with multiple cylinders, it varies slightly watch to watch but the overall concept is to treat it like layers. The caseback, the main core of the case and the bezel. It's far more efficient to have these a 3 seperate objects to begin with rather than trying to create it all from one cylinder, although that is another method.

Segments/Polygons

It's important to understand rotation segments which includes the topic of polygons and the amount of them in the scene. Typically, the more polygons you use the higher detail and more complex you are able to make the model, but this also means the scene has far more to process, slowing down render times and overall performance of the scene. In an industry like game design you would want to use as few polygons as possible to use the least amount of performance. However, in product rendering we do not have this issue. Although, It's always nice to keep in mind how many polygons you are using as it is possible to have too many and bog down the scene unnecessarily. Rotation segments are a similar concept, the more you have the easier and more detailed you can make the lugs, but too many and it just becomes too complex for its own good. The lugs are usually the most intricate and difficult things to model when it comes to watches. This is due to their angles and complex shape. The best way to tackle this is to have a technical drawing or photo side-on to be able to model from. Although, there are situations in the early stages of design where we do not have access to this. Therefore, it just comes down to trial and error. In our case, a 3D printer plays an important role in this design as we can print it out physically. This allows us to be able to put on straps and our wrist to determine the positioning and design of the lugs, to make sure it wears well. However, in this situation it is the same case as the previous workshop watch models. This means we were able to take a photo side-on and can use this to determine the lugs.

Tools and Modifiers

Within Cinema 4D you can make the most of all the functions when creating your model. These are equivalent to tools in something like Photoshop for example, the pen tool. A common theme through 3D modelling is that there is usually multiple ways of achieving the same outcome, but the modifiers job is to make it easier. A great example of this is this is the Bevel function.

Bevel

The term 'bevel' may be familiar to you, so the tool is somewhat self-explanatory. A bevel is a sloping surface or edge and in the 3D workspace it is perfect for getting a precise rounded edge on your models. The other way of getting this result would be to manually create the edges/cuts and to position them yourself to get the same effect. However, this is inefficient and hard to get 100% accurate. When using the bevel tool you can select how many subdivisions you want to be created and how much of a rounded edge there should be, it's a very fast, reliable way to produce a smooth rounded edge.

Loop/Path cut

This tool is probably my most used tool when modelling. This is used to create a new edge (a new cut in the model) to be able to model from. The main thing that makes the loop cut stand out from just a simple point to point knife cut is that it takes the rest of the model in to consideration, the best example is on a cylinder. This cut calculates the other faces around it and works out it can create a perfect 'loop' cut. This is very useful when wanting to create accurate edges and cuts to extrude from. It also comes in useful when using subdivision surface.

Extrude

If you are somewhat familiar with 3D programs, extrude is probably the first tool that comes to mind. It is a function on pretty much every 3D software there is, as it's vital for modelling. Combining loop cuts and extruding means you can extend the polygons in the way you want. In my example here, this is a method on making a very basic bezel shape for a watch.

Subdivision Surface

This is one of the most important modifiers for photo-realism and I use this on almost every model I create. This modifier calculates the current polygons and smooths them out. Slightly smoothing the edges and changing the way light effects the model. As you can tell by the examples below it massively improves the realism of the model. It gives the angles some depth rather than a pixel perfect edge to edge. This allows the light to bounce off realistically creating rim lights and realistic shadows. Combining subdivision surface with loop cuts gives you a lot of control on how sharp you want the edges to do be.

Summary

As with most things, I feel modelling does come down to 'practice makes perfect'. The more experience you have the more efficient you become and your knowledge will allow you to use multiple methods to create models. You can make the most of the tools I've gone through and so much more to be able to create diverse shapes and detailed models. Stay tuned for the upcoming 3D Artist's Notebook to learn more about the other steps for creating a photo-realistic listing image.


Also in Geckota Magazine

We’re Featuring at British Watchmaker’s Day!

February 19, 2024 2 min read

Read More
What are Mecha-Quartz Watch Movements?

February 12, 2024 3 min read

Read More
New Geckota Pioneer Dials: Brushed Black and Brushed Beige Released

February 08, 2024 2 min read

Read More
 Greg Mayo

About the Author: Greg Mayo

About the Author: Greg Mayo

At Geckota our mission is to provide watch lovers, enthusiasts and collectors with a unique opportunity to own and cherish luxury and contemporary timepieces and accessories that reflect modern life.

More Articles by Greg Mayo