SHIPPING WORLDWIDE WITH ALL IMPORT TAXES PRE-PAID

0

Your Cart is Empty

 Alice Anderson

Author

Categories

Categories

April 07, 2020 5 min read

Lighting within the World of Watch Photography - Part Two

About halfway through writing my last article on lighting I realised that this could have been an extremely long article… As I work with lighting every day as part of my job I have never really noticed how much there actually is to it. Lighting is just one of those aspects that I mostly do on auto-pilot now, so I decided to make it a two part-er. Rolling on from the last, part two of this article will talk a little more about flash, continuous lighting, lighting styles, and how to deal with lighting different dial and case textures. To read part one you can click here!
Zenith El Primero A384 Revival fitted to the Radstock Leather Strap - Image Credit: Geckota - Camera: Canon EOS 700D, Lens: Sigma Art Prime 50mm, ISO: 400, Aperture: f/3.5, Shutter Speed: 1/800 sec.

Flash vs Continuous Lighting

Continuous light refers to light that is always on, in comparison to flash which lets out a quick burst of light when needed. Deciding on which is best to use completely depends on the subject matter, mood and even personal preference. Personally I have always preferred the free option of ambient lighting, the sun! It’s a great way to practice using things such as reflectors and diffusers, too.
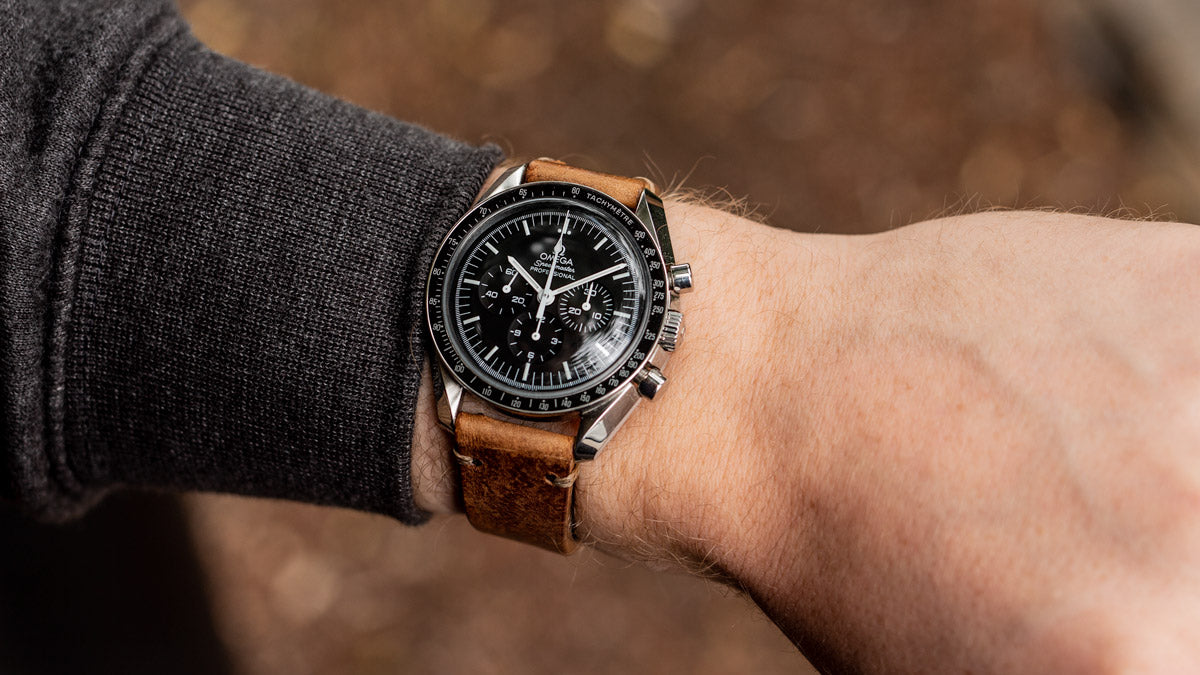
Omega Speedmaster fitted to the Simple Handmade Short Leather Strap - Image Credit: Geckota - Camera: Canon EOS 700D, Lens: Sigma Art Prime 50mm, ISO: 200, Aperture: f/3.5, Shutter Speed: 1/100 sec.

Continuous

Another reason I always fall to continuous lighting is for the simple fact that you get what you see. It’s the easiest way to see what your image will look like, and if you’re using light kits rather than natural light you can have a lot of control.
Geckota C-01 Gen 2 fitted to the Diamond Quilted Leather Strap - Image Credit: Geckota - Camera: Canon EOS 700D, Lens: Sigma 105mm, ISO: 100, Aperture: f/4, Shutter Speed: 1/25 sec.
One issue that comes with continuous light is having to bump the ISO higher when needing a faster shutter speed, which can result in images being grainy (known in the photography world as noise). Noise can make the image look unappealing and reduce the amount of details in a shot. Some people use this to their advantage to create a more vintage look, but when photographing watches I tend to avoid noise as much as possible.
Left Image with Noise and Right Image with Reduced Noise - Image Credit: Geckota

Flash

If you’re setting up an image which is more still life then continuous light is a great way to go. So, why use flash? Well, flash and strobe lights are perfect if you’re wanting to capture something moving whilst avoiding any motion blur. A major pro with flash is that you can have a low ISO, avoiding that grainy look most of us try desperately to avoid!
A Photography Studio Lighting Setup
Many photographers use flash to create a dramatic vibe by illuminating a dark area, or to sharply capture motion. One thing to keep in mind when using flash is that it can be difficult to know what the outcome will look like. This means you’ll have to test your lighting out a few times to ensure it’s placed correctly and at the right intensity. This gives people a reason to avoid flash, but once you understand it the results can be powerful. It’ll also open doorways to build confidence shooting in any setting, whether it’s a watch or a wedding!

Soft vs Hard Lighting

The best way to find your own style in photography can be to practice with how soft or harsh the lighting in your images are. Both come in handy for different purposes. I tend to use a mix here at Geckota, using diffusers to help create generous soft light, or using a much harsher, directional light to get moody shadows. One thing to keep in mind when taking photos of watches is that lighting is vastly affected across different parts of any watch. Polished areas can become overexposed when trying to light brushed areas, or the dial texture may become diluted if the lighting isn’t placed properly.
Geckota G-02 fitted to the Marine Nationale NATO on the left, and Beads of Rice Metal on the right
Above is an example of hard and soft light. The lighting on the left image was taken with a stronger, directional light. This has created a more defined flecto across the crystal, and the lighting on the case is additionally sharper. The image on the right has been taken with softer lighting using diffusers - you can read more about the use of diffusers here! - which creates a gradient of light across the dial and case. Although it completely depends on the style of image, I prefer to use softer light as much as possible as it can help make metal sections look smoother. Play around with the lighting in your images by using different sized lights, or move the lights closer or further away from your subject to experiment with these lighting techniques!
Tudor Black Bay 58 fitted to the Padded Sailcloth Strap - Image Credit: Geckota - Camera: Canon EOS 700D, Lens: Sigma Art Prime 105mm, ISO: 100, Aperture: f/4, Shutter Speed: 1/20 sec.

Lighting Brushed Textures

We all know that watches come in all kinds of shapes, sizes and metals. We always want to show off it’s best features, whether you’re photographing a watch for work, or just for fun. Some dials I photograph prove more challenging than others, most of which include brushed or sunburst textures.
Geckota E-01 Dial - Image Credit: Geckota
Dials can prove challenging to light because of other factors - such as the crystal - which impacts the way light reflects off of it. Once you have set up your shot, move the lights at different angles around the watch to see which ways light up the texture best. Also, using one directional light, rather than multiple lights, will help you achieve this. Most of the time I will avoid using a diffuser when photographing brushed areas as it can dilute the texture, leaving the brushing to look weak.
Geckota C-03 Dial - Image Credit: Geckota

Lighting Polished and Gloss Surfaces

Polished surfaces should have a decent amount of highlights and shadows to show that it is polished. An easy way to light reflective areas is by using white and black card. This way you can reflect the white onto surfaces you want to light, whilst using the black to block out the light, defining shadowed areas.
Geckota G-01 Case - Image Credit: Geckota
PhotoShop can play a huge part in photography, and if you understand how to use it properly then you’ll be able to create wonders! You may find that you need to photograph parts of the watch separately, then edit those parts together in PhotoShop. An example of this would be to photograph the dial and case using two different light setups, then move the good image of the dial onto the good image of the case. Another thing to keep in mind is the surface and props you use in your images. Polished areas will reflect this, and can change the colour of the metal drastically.
Geckota C-04 - Image Credit: Geckota
Thank you for reading! If you haven’t already, be sure to read part one of this article, and keep an eye out for more photography based articles in the near future...


Also in Geckota Magazine

We’re Featuring at British Watchmaker’s Day!

February 19, 2024 2 min read

Read More
What are Mecha-Quartz Watch Movements?

February 12, 2024 3 min read

Read More
New Geckota Pioneer Dials: Brushed Black and Brushed Beige Released

February 08, 2024 2 min read

Read More
 Alice Anderson

About the Author: Alice Anderson

About the Author: Alice Anderson

I'm the Photographer here at WatchGecko. My love of watch photography has become a bit of an obsession, where every day I can expand my creativity whilst working with some really interesting watches that keep my passion alive.

More Articles by Alice Anderson